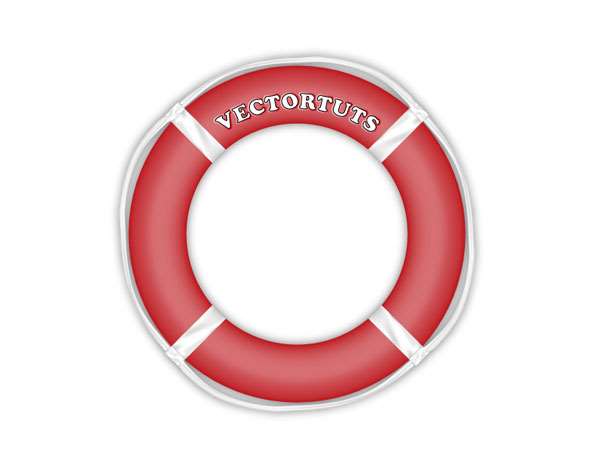


这篇教程教优图宝的朋友们用AI绘制救生圈,教程属于入门级别的教程。大致介绍渐变的使用和一些基础操作,转发过来希望优图宝的朋友们喜欢这篇教程。先来看看最终的效果图: 
Utobao编注:更多AI教程学习进入优图宝AI实例教程栏目:http://www.utobao.com/news/61.html
具体的绘制步骤如下:
Step 1
First, create a new document in Illustrator at 800 pixels by 600 pixels. Enable the Ruler (Ctrl+R) and turn on the grid on (Ctrl+"). Then drag a horizontal and a vertical guide onto the artboard.
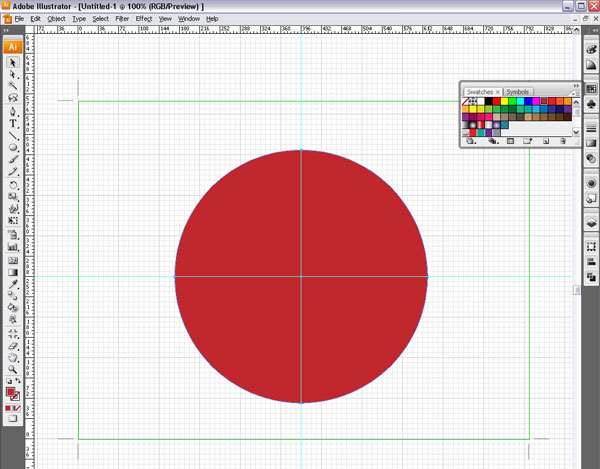
We’ll start by creating our shapes. Select the Ellipse Tool (L), and click on the center point of our guides. Then drag outwards by holding down the Shift + Ctrl keys. This will give us a circle that is centered on the grid/guides. Fill the circle with a red color (R=190 G=28 G=35) and leave the stroke empty.
1. 首先,新建Illustrator文档,800*600px。显示标尺(Ctrl+R),并且显示网格(Ctrl+")。然后鼠标拖拉水平和垂直参考线到画板。
我们先创建形状。选择椭圆工具(L),在参考线的中点单击。然后按住Shift + Alt键向外拖拉。这样绘制的圆以水平和垂直参考线的交叉点为中心。圆填色:红色(R=190 G=28 G=35),描边无。
 Step 2
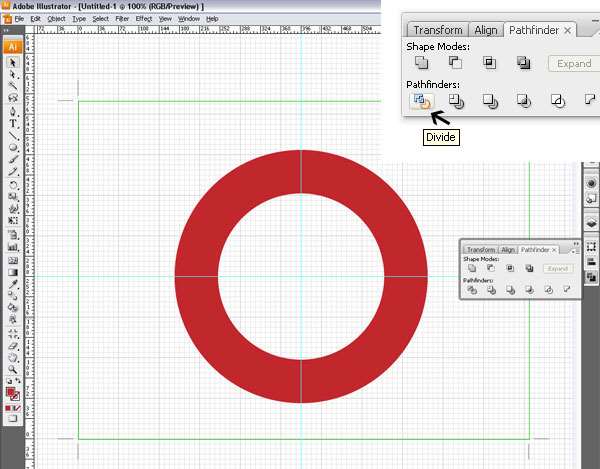
Create another circle, as in the previous step. Then make it about 75% smaller then the first circle. Give it another color so it is easy to see. Select both circles, open the Pathfinder Palette, and click on the Divide Tool. Deselect the shapes, then re-select the smaller circle, and then delete it.
2. 创建另一个圆,同之前的步骤。这个圆是第1个圆的75%。填充另一个颜色,使它可见。同时选择这2个圆,打开路径查找器面板,单击分离工具。取消选择所有形状,然后再选择小圆(译者注:使用编组选择工具选择),然后按Del键删除。
 Step 3
Create a rectangle about 25px wide by 600px high. Then fill it with white and leave the stroke empty. Select both the circle and the rectangle with the black arrow tool. Click one time on the circle (to indicate that this is your base for alignment).
Then open the Align Palette. Click on the Horizontal Center Button and then on the Vertical Center Button. This will center the rectangle with the circle. Now repeat this step and set it perpendicular to the first rectangle. Select both of the rectangles and rotate them 45 degrees.
3. 绘制一个25*600px的矩形。然后填色:白色,描边:无。使用白箭头工具选择(译者注:直接选择工具)圆和矩形。在圆上单击一下(表示这是你对齐的参照物)。
然后打开对齐调板。单击水平居中对齐和垂直居中对齐。这将使矩形和圆居中。现在重复这个步骤,使它和第一个矩形正相交。选择这2个矩形,旋转45度。
 Step 4
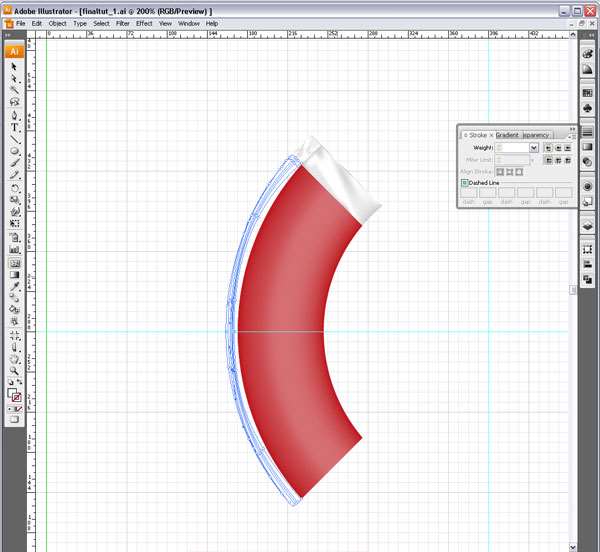
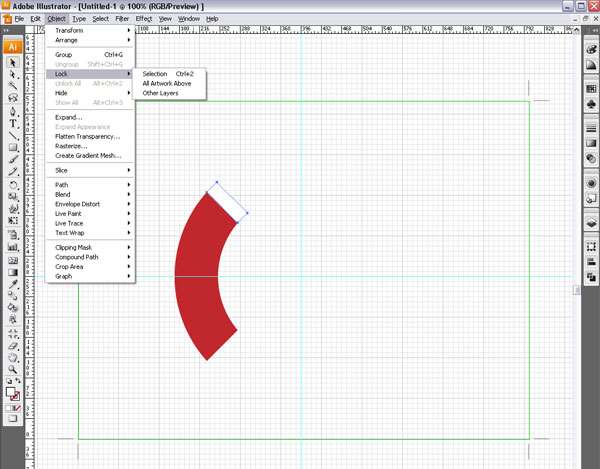
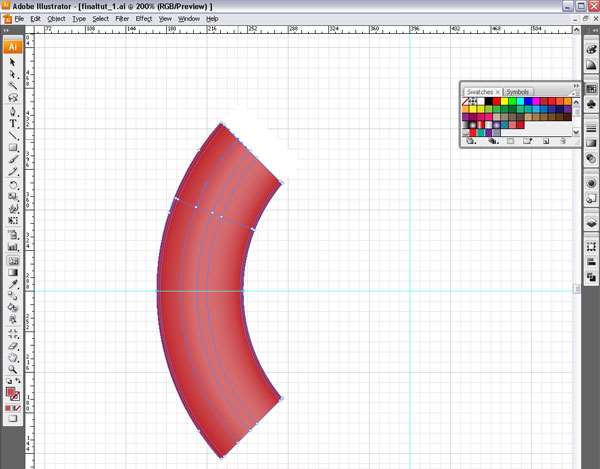
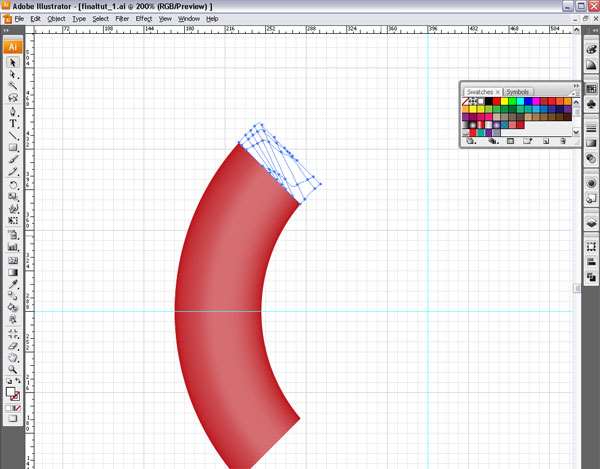
Select all of your objects. Then open the Pathfinder Palette and click on the Divide Tool. We’ll delete most of the shapes now. We need only two. After we apply the mesh tool, all we have to do is duplicate them.
Delete all the shapes until you have a quarter circle with a white shape left on your art board, as in the image below. Once you have done that, select the white shape, and Lock (Command+2) it. This will allow us to apply the mesh tool to the red shape without the white shape interfering.
4. 选择所有的对象。然后打开路径查找器面板,单击分离工具。现在我们将要删除大部分的形状。只留下其中的2个。应用网格工具后,我们需要做的就是复制它们。
删除形状,只留下1/4的圆和一个白色的形状,如下图所示。完成后,选择白色形状,锁定它(Ctrl+2)。这使我们在红色形状上应用网格工具时不会受到白色形状的干扰。
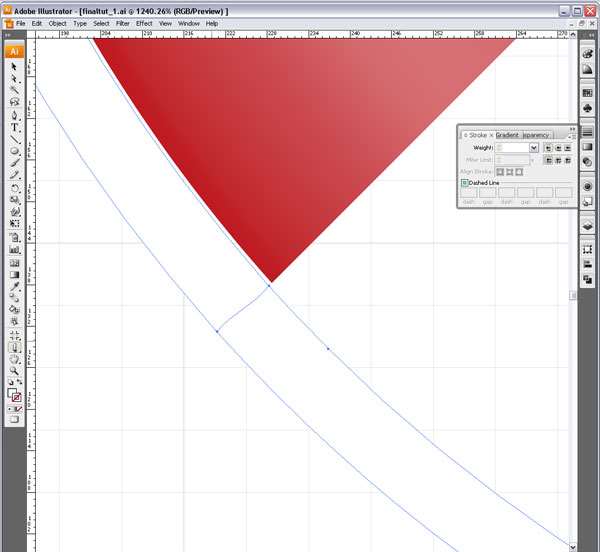
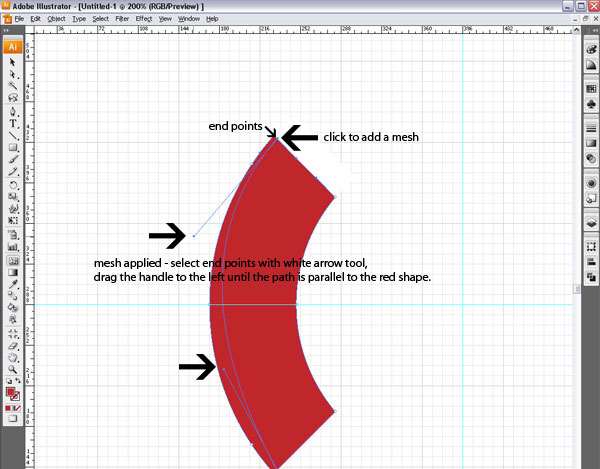
Now we’ll apply the Mesh Tool. Select the red shape with the black arrow. Make sure no color is selected (no fill and no stroke). Then select the Mesh Tool (U), and move it over the top path of the red shape. You’ll see a “+” which indicates that we will add a mesh.
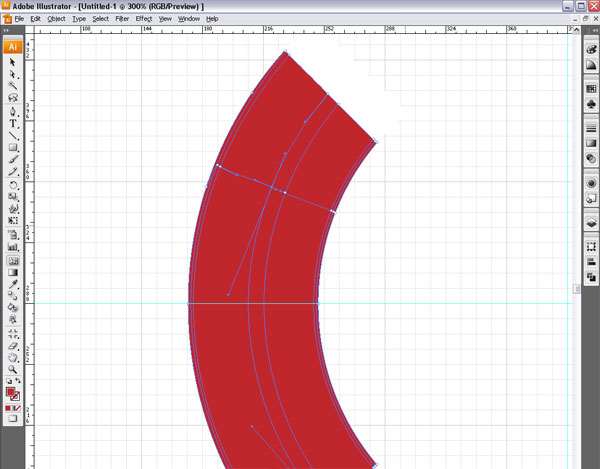
Click on the path to add the mesh, then select the white arrow tool, and select the end point. This makes the handle visible. Start dragging it until the mesh path is parallel to the shape’s outline. Repeat this with each end point. Add a few more Mesh Paths (U).
5. 现在我们将应用网格工具。使用黑箭头工具选择(译者注:选择工具)红色形状。确定没有选择颜色(无填色,无描边)。然后选择网格工具(U),鼠标移动到红色形状的顶部路径时,你会看到一个“+”,这表示我们将添加一个网格。
在路径上单击添加网格,然后选择白箭头工具,选择结束点。这使得手柄可见。拖拉它,使得它与形状的轮廓平行。每一个结束点都重复这个步骤。添加几个网格路径。
 Step 6
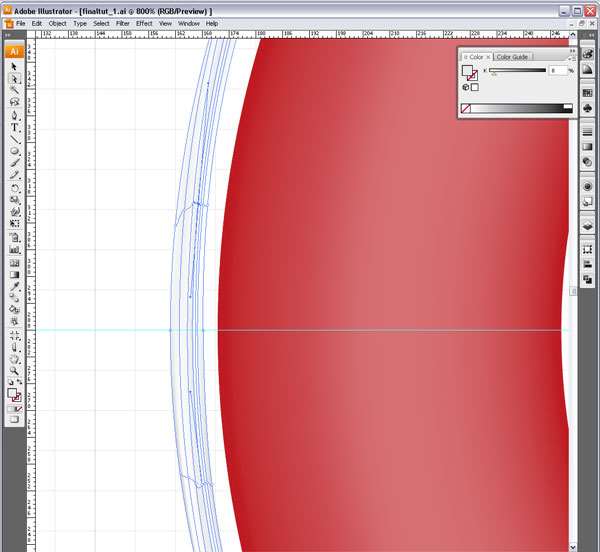
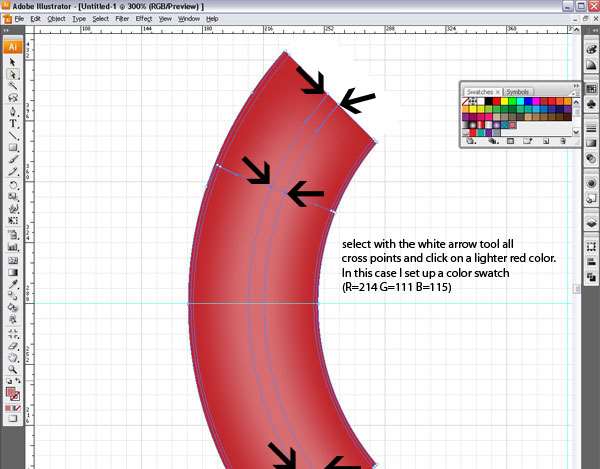
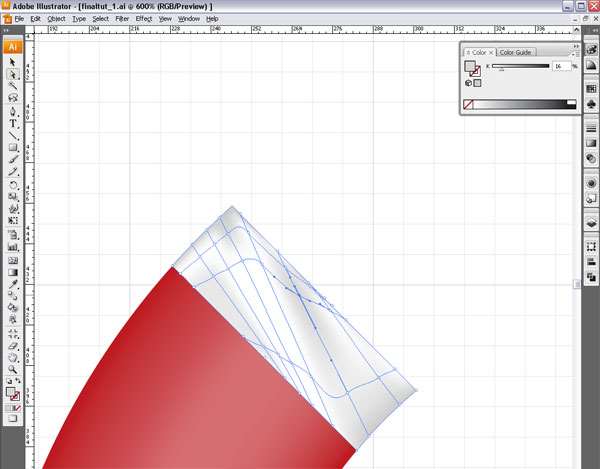
Now we’ll add some highlights. I set up a slightly lighter red as a color swatch (R=214 G=111 B=115). Then select the cross points of the two Mesh Paths with the White Arrow Tool. Click on your color swatch. This adds a gradient to the mesh and works perfect with elliptical objects.
The color choices are of course optional. Once that is done and you think it needs some more depth, you can add another mesh path. Simply make sure that the lighter color is selected, and click with the Mesh Tool on the red shape.
6. 现在我们将要添加高光。我创建了一个亮红色(R=214 G=111 B=115)。然后使用白箭头工具选择2个混合路径的交叉点。单击色板。这就添加了一个渐变混合。使之完美地融合进了椭圆形状中。
颜色的选择当然是随意的。完成后,你想到它还需要一些层次,你可以添加另一个网格路径。确认选择了更浅的颜色,然后使用网格工具,在红色形状上单击。
 Step 7
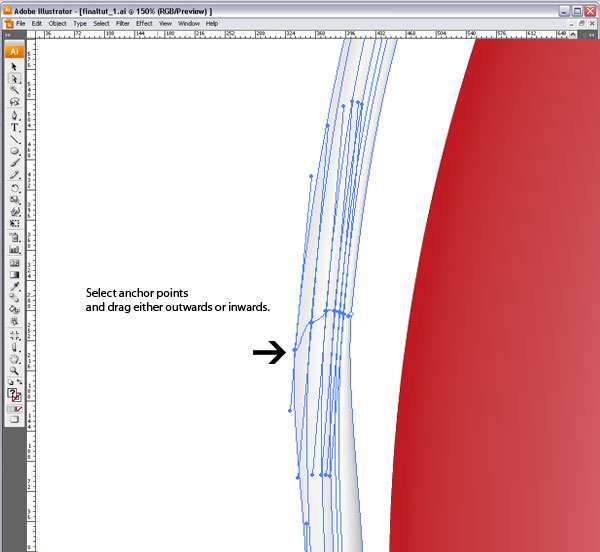
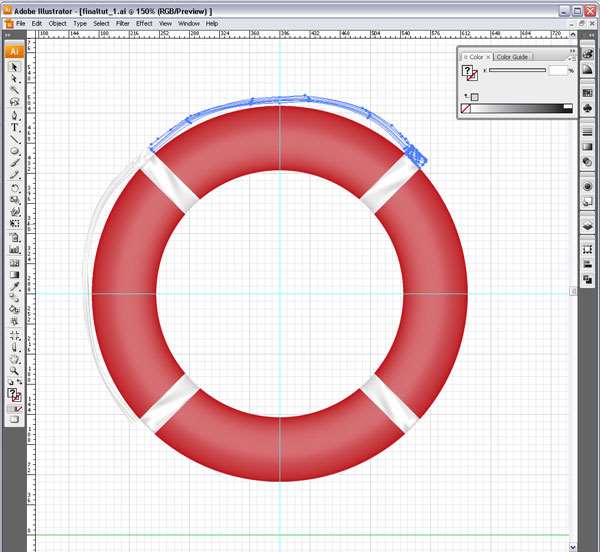
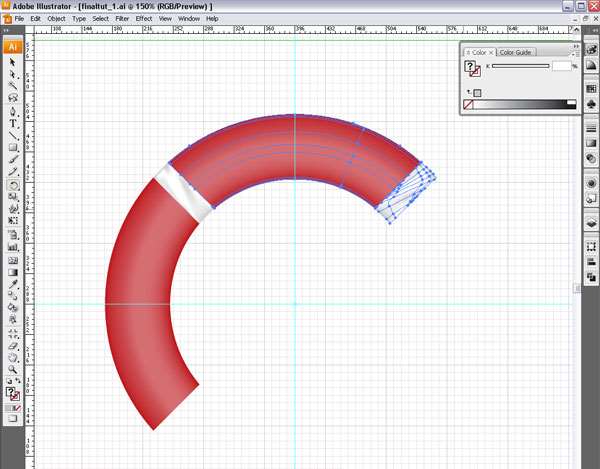
In this step, we will repeat the use of the Mesh Tool on the white shape. Unlock all your shapes. Select the Mesh Tool (U). Then add Mesh Paths to your white shape. Select the Anchor Points and add some grey. I chose different shades of grey so it looks a little bit more realistic.
7. 这一步,我们将在白色形状上重复网格工具的使用。解锁所有的形状。选择网格工具(U)。然后在白色形状上添加网格路径。选择网格点,添加灰色。我选择了不同的网格点添加灰色,因而它看上去更加地逼真。
 Step 8
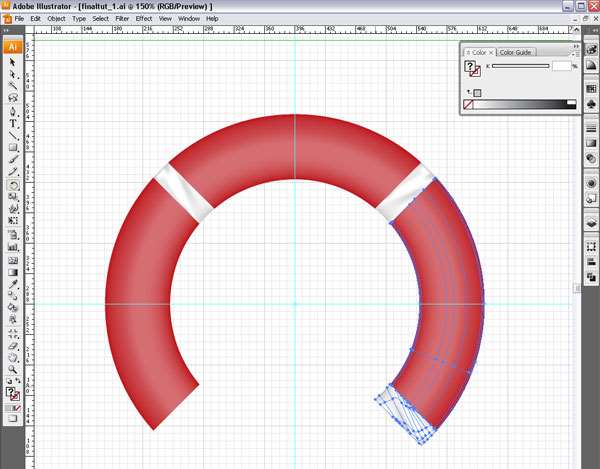
 Step 99. 现在救生圈已经做好了,该添加束缚绳索的形状了。使用钢笔工具绘制一个矩形,如下图所示。使用网格工具(U),然后添加网格路径,网格点应用颜色,同我们之前的操作。这将创建出绳索穿过的形状。