
 UtoBao编注:更多PS图片合成教程学习进入优图宝ps图片合成栏目,地址:http://www.utobao.com/news/58.html
In this tutorial I will show you with an example of horse how to turn an ordinary animal to a robot.
Step 1
The first thing you need to do is to find a great source image to start with. The techniques of this tutorial can be used
on any animal or even human, so choose something to your liking. Try to find expressive and clean image, it is one of the important steps that will ensure great result.
I chose a photo of horse that I had taken this summer. Why this one? It is crisp and has a beautiful perspective. And finally, I just love it.
Step 2
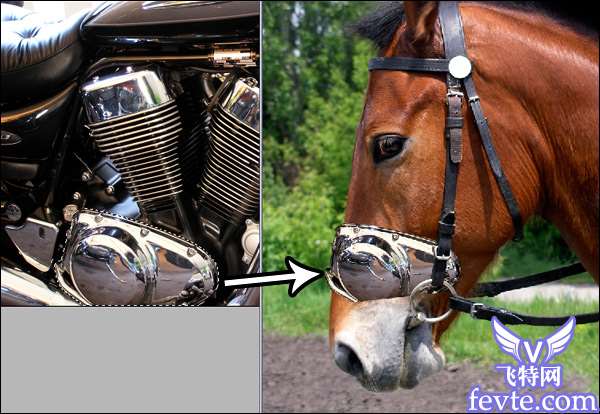
Now we have to find mechanical parts for our horse. Different photos of cars, motorcycles, engines, even washing machines and medieval armor are our purpose.
Here is the set of links to photos that I used in this tutorial:
http://www.sxc.hu/photo/1020017
http://www.sxc.hu/photo/315179
http://www.sxc.hu/photo/233279
http://www.sxc.hu/photo/187500
http://www.sxc.hu/photo/648267
http://www.sxc.hu/photo/486277
http://www.sxc.hu/photo/805174
http://www.sxc.hu/photo/189425
http://www.sxc.hu/photo/172724
Step 3
I selected the bridle with Pen Tool and copied it to a new layer before mechanizing the horse. The bridle must always remain at the top layer and the mechanical parts will be place under it.
Open the photo of motorcycle engine and select the proper part. There are many different ways to select something. It is easier to make an exact selection of mechanical part with Pen Tool because such parts usually have smooth and flat contours. Use Lasso Tool for more complex contours.
Copy selected part to the document with horse. Press Ctrl+T and then resize, move and transform the part to give it the best fit. This operation will be the main one until you cover the animal with metal parts completely.
Step 4
This chrome detail is cropped and has undesirable reflections. I fixed that with Clone Stamp Tool.
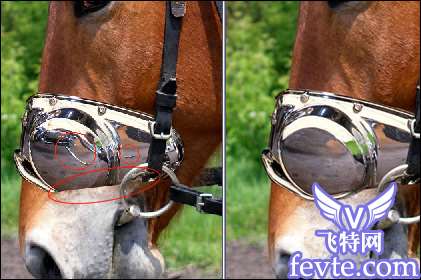
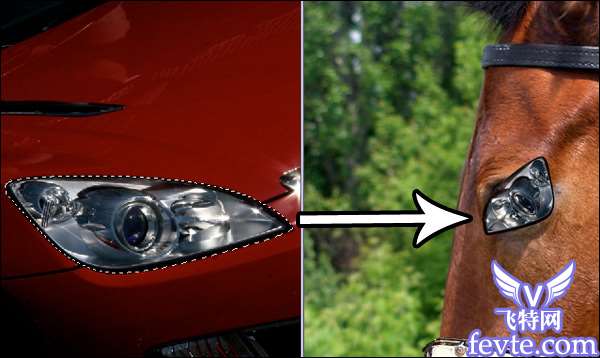
Step 5
Your task is to find mechanical parts that resemble certain parts of animal. For example, use car headlight to create the eye. The principle is the same: select, copy, move and transform. Hold Ctrl when you want to move the point of Free Transform box independently.
 _ueditor_page_break_tag_
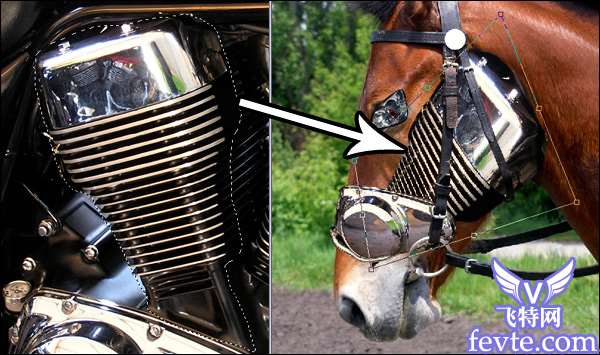
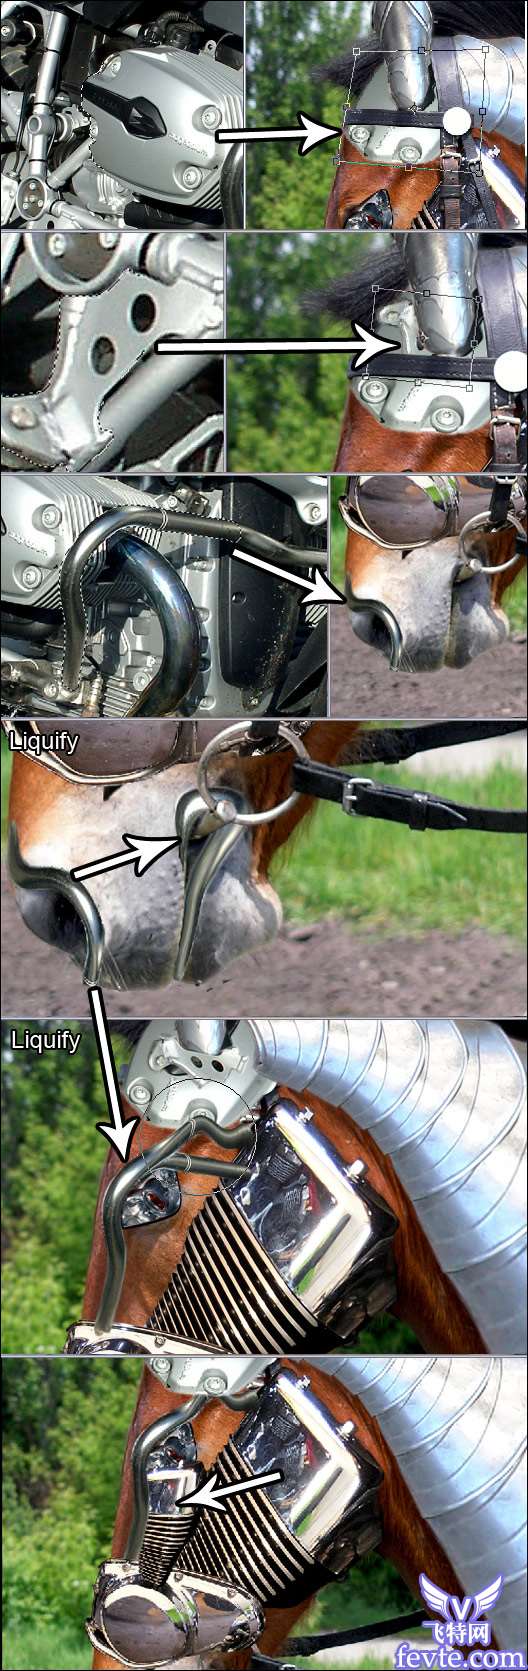
Step 6
Motorcycle cylinder is a good variant for a cheek…
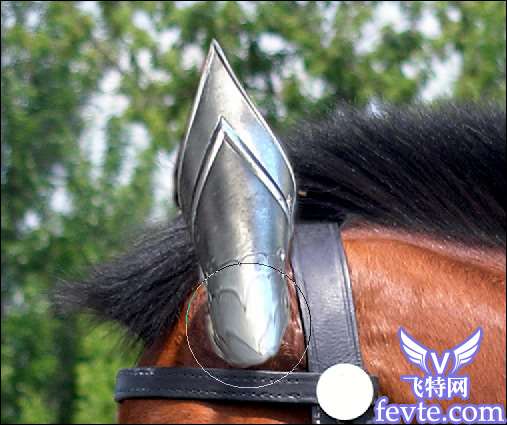
Step 7
…and the steel cuff - for an ear.
Step 8
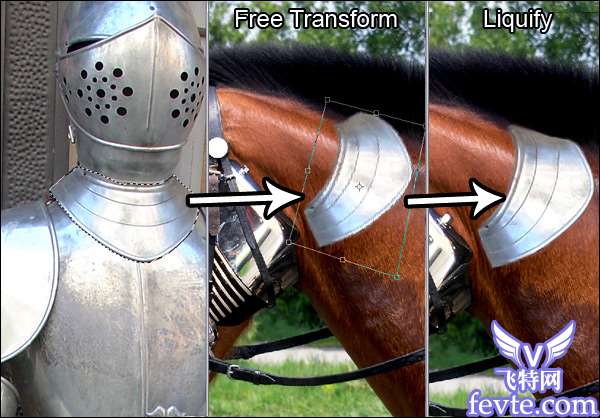
Sometimes you'll need to adjust the form of a part. Go to Filter - Liquify… and use Forward Warp Tool (it is usually selected by default) to give it the best look.
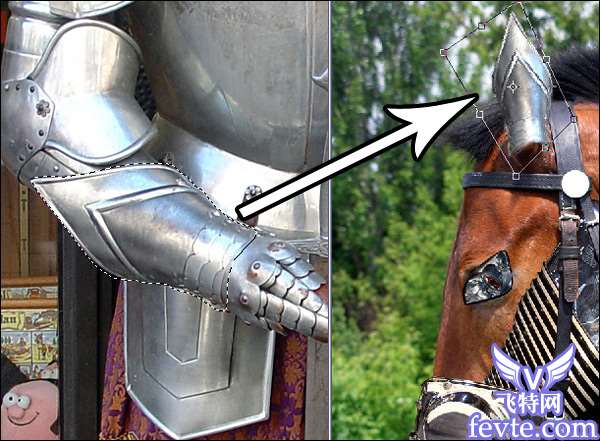
Step 9
I transformed neck part of knight armor to create horse neck plates.
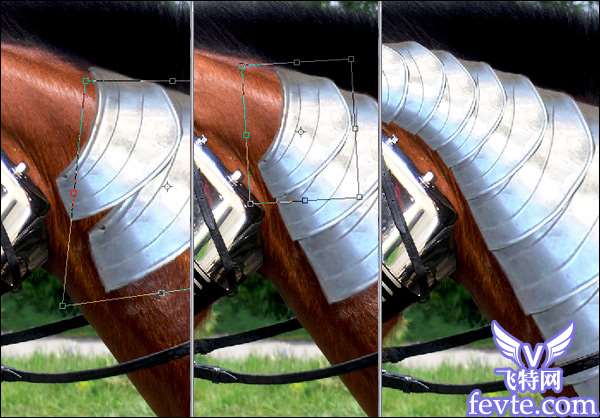
Step 10
When you've done with one neck plate, duplicate the layer to create the next. Adjust its size and angle. Repeat this procedure until the whole neck will be covered with plates. Notice that a certain gap between the plates is needed to provide the flexibility of neck.
Step 11
Go on with the following parts, the principle remains the same.
 _ueditor_page_break_tag_
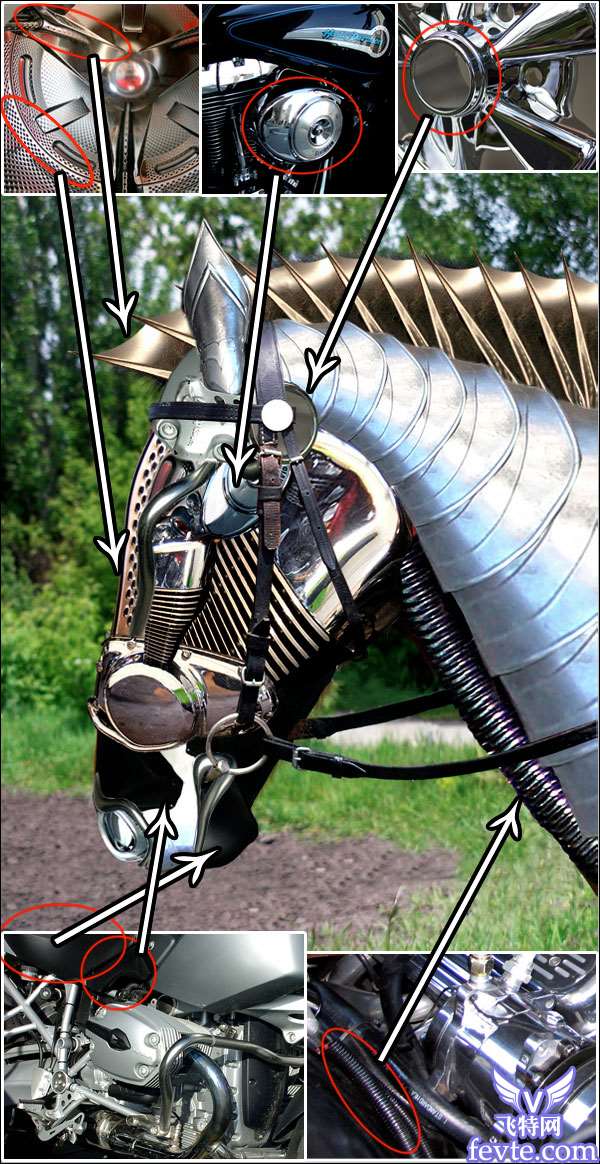
Step 12
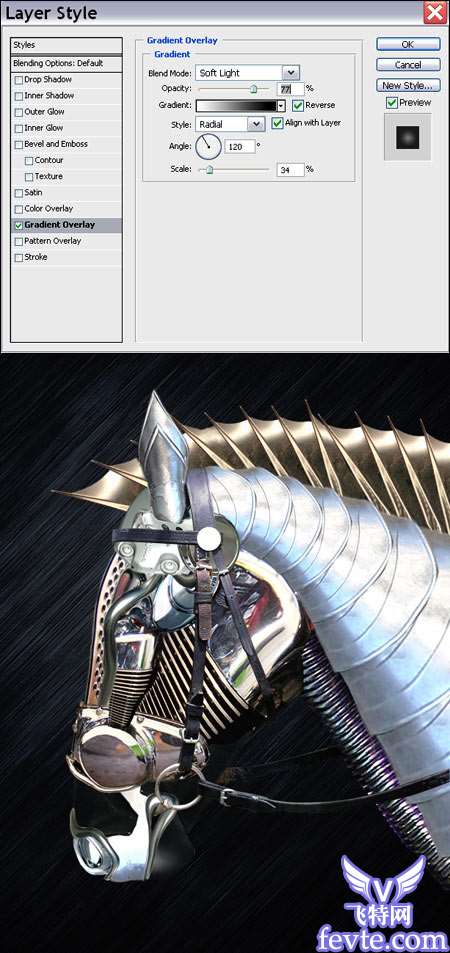
The robot looks out of place because of the background. Fill the background layer with black and use Filter - Render - Clouds. Apply Filter - Render - Difference Clouds to the same layer.
Apply three filters one after another:
1. Filter - Sketch - Chrome (Detail=10, Smoothness=0)
2. Filter - Artistic - Film Grain (Grain=0, Highlight Area=2, Intensity=5)
3. Filter - Brush Strokes - Angled Strokes (Direction Balance=85, Stroke Lenght=50, Sharpness=4)
At last, double click on the layer and apply the following style:
Step 13
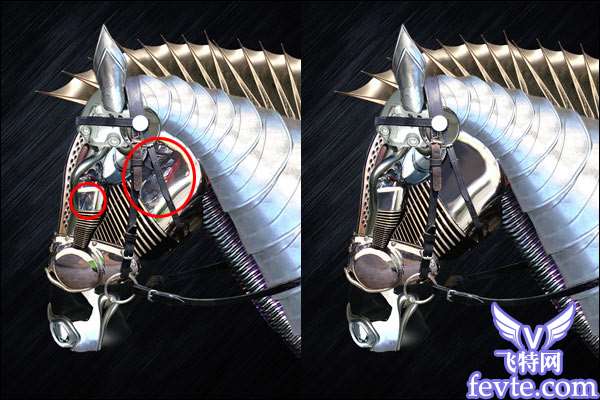
There are relections on some parts, which I want to remove. Smudge Tool (spatter brush, 85% strength) will help in this case.
Step 14
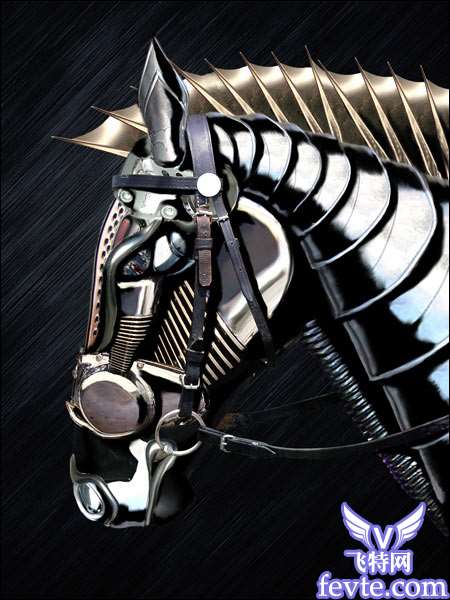
Almost last stage. I am adding shadows to make a complete creature from the separate elements. Create a new layer above the layers with parts of robot, take hard round black brush, choose the direction of light and paint black areas where shadows supposed to be. Every element has its shadow.
 _ueditor_page_break_tag_
Step 15
I smoothed the rough edges of shadows with Smudge Tool (soft round brush, 70% strength).
Step 16
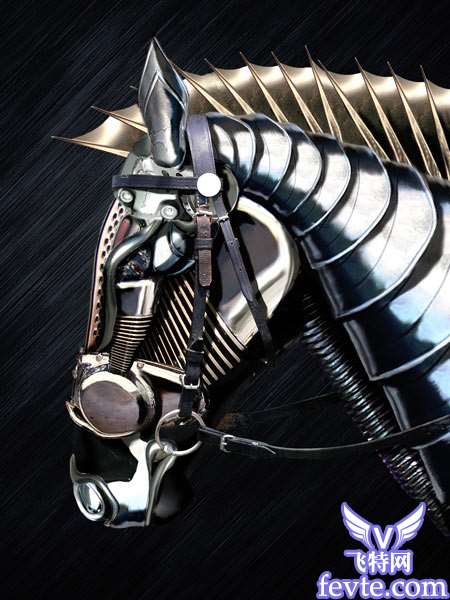
Set layer opacity to 70%. Ctrl+J to duplicate the layer with shadows. Set blending mode of the first layer to Overlay. The first layer adds the necessary color and the second - the depth of shadows.
Step 17
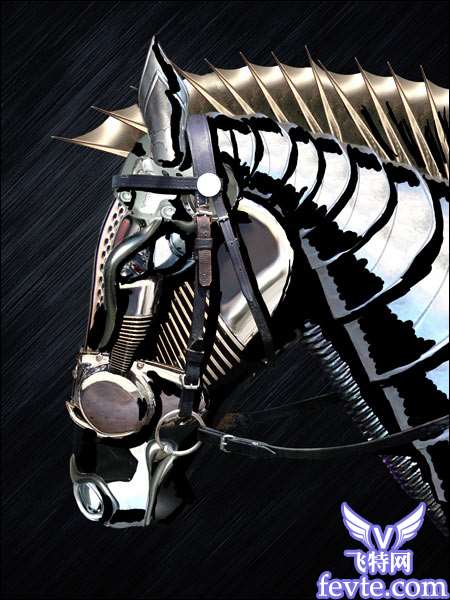
Now it's time to put the final touches to picture. Create new layer over the layers with robot, change its blending mode to Overlay, choose red color and paint a red stain over the eye. Select blue color and repeat the procedure with nostril.
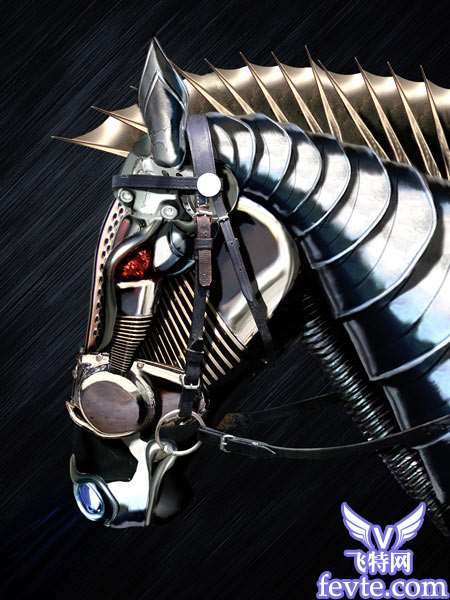
Final
At the last moment I decided to add metal plates to the bridle using the part of ear as a source.
Now it's done. Thank you for reading.
UtoBao编注:更多PS图片合成教程学习进入优图宝ps图片合成栏目,地址:http://www.utobao.com/news/58.html